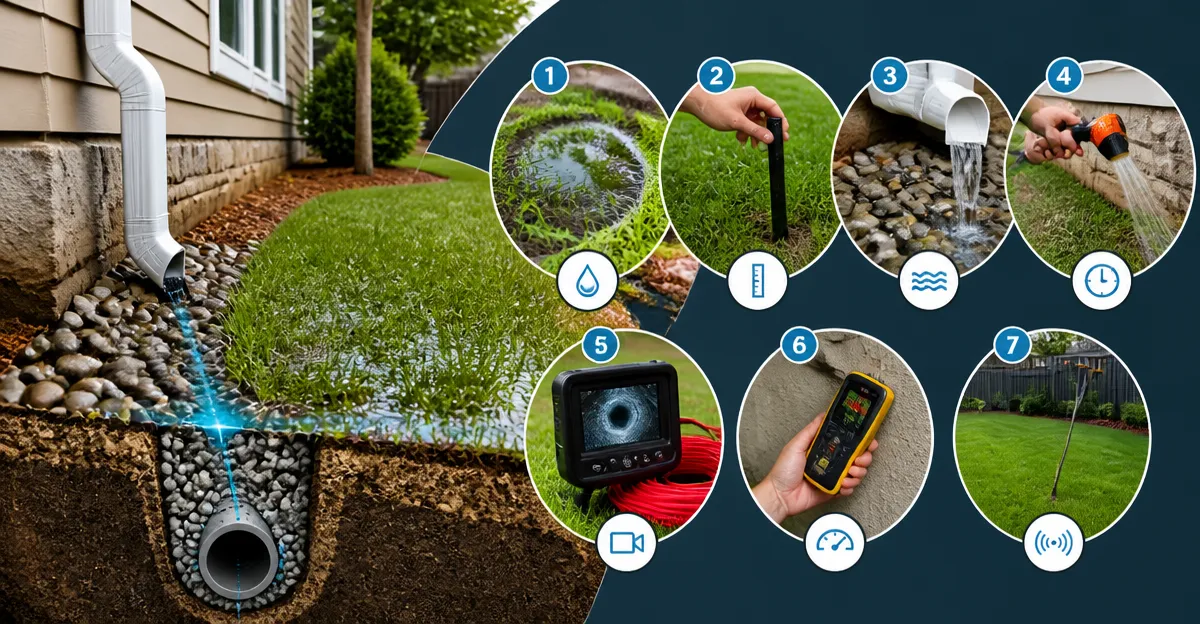
Introduction
Detecting a clogged French drain can be daunting when the solution appears to require costly excavation. This guide explains seven quick, non‑invasive tests that enable homeowners to confirm a blockage before committing to major repairs. Each test is described in clear, actionable language, allowing one to diagnose the problem with confidence. By the end of the article, readers will understand how to locate the obstruction, decide whether professional help is required, and select the most appropriate inspection tools.
What You’ll Need
- Flashlight or headlamp for visual checks in dark areas.
- Garden hose with adjustable nozzle.
- Measuring tape (at least 10 ft).
- Protective gloves and safety glasses.
- Inspection camera (optional but highly recommended). For a versatile, budget‑friendly option, consider the MugEasy Endoscope Camera.
Step 1: Observe Surface Water Behavior
Begin by examining how water behaves on the landscape surrounding the French drain. After a heavy rain, note whether water pools near the foundation, forms soggy spots, or drains slowly into the lawn. Consistent pooling suggests that water is not reaching the perforated pipe, a classic sign of blockage. Record the locations of any standing water, as these observations will guide later tests and help determine the most likely obstruction zone.
Step 2: Conduct a Water Flow Test
Connect a garden hose to a faucet near the drain’s inlet and run water at a moderate pressure for several minutes. Observe whether the water disappears quickly into the ground or lingers on the surface. If the water remains visible after ten minutes, the drain may be clogged or the outlet may be obstructed. This test is inexpensive, requires no specialized equipment, and provides a baseline for further investigation.
Step 3: Visual Inspection with an Endoscope Camera
When surface observations are inconclusive, a visual inspection inside the pipe can reveal the exact nature of the blockage. Insert the probe of the MugEasy Endoscope Camera into the clean‑out access point or the nearest vent. The device features a 4.3‑inch IPS screen, dual‑lens split view, and eight adjustable LED lights, allowing one to see clearly even in dark, wet conditions. Its 32.8 ft semi‑rigid cable reaches deep sections of the drain, making it suitable for residential installations. The camera is IP67 waterproof, so it can operate safely inside damp pipe walls. As the probe advances, watch for debris, sediment, or root intrusion on the screen. Capture still images for later reference; the built‑in memory eliminates the need for a smartphone connection.
Step 4: Check for Root Intrusion
Tree roots are a common cause of French drain blockages, especially in mature landscapes. After visualizing the interior with the endoscope, look for fibrous, branching structures that resemble roots. If roots are present, they can be trimmed with a long‑reach pruning saw or removed using a root‑cutting attachment on a drill. In cases where root growth is extensive, professional excavation may be required, but the visual confirmation helps justify the expense.
Step 5: Perform a Pressure Test
Seal the drain’s inlet with a temporary plug made from a rubber stopper or a tightly fitted PVC cap. Then, using a garden hose, apply water pressure while monitoring the outlet for any leakage. A steady flow out of the outlet indicates that the pipe is still functional, whereas a lack of output confirms a blockage downstream of the test point. This method is particularly useful when the drain has multiple access points, allowing one to isolate specific sections.
Step 6: Use a Flexible Inspection Probe
If the endoscope cannot reach the suspected blockage due to pipe curvature, a flexible probe can help push the obstruction aside. The Teslong Borescope includes a 16.5 ft semi‑rigid cable with a 8 mm camera probe, eight LED lights, and a 78° wide viewing angle. While its primary purpose is visual inspection, the sturdy cable can be gently rotated to dislodge loose sediment without damaging the pipe. Its IP67 rating ensures reliable operation in wet environments, and the included 1500 mAh battery provides up to three hours of continuous use.
Step 7: Verify Drainage After Clearing
After any cleaning attempt, repeat the water flow test from Step 2 to confirm that water now disappears rapidly into the soil. Additionally, run the endoscope once more to ensure that the interior is free of debris. If water still pools, consider repeating the root removal process or consulting a professional for a more thorough excavation. Document the results of each test; a clear record assists future maintenance and can be shared with contractors if needed.
Tips & Pro Tips
- Schedule inspections during dry weather to avoid false‑positive pooling results.
- When using an endoscope, keep the probe steady and avoid sudden bends that could damage the cable.
- Apply a biodegradable drain cleaner after clearing debris to help prevent future blockages.
- Consider installing a clean‑out access point if the current system lacks one; this simplifies future inspections.
Troubleshooting
No Image on the Endoscope Screen: Verify that the battery is fully charged and that the LED lights are turned on. If the screen remains dark, check the cable connectors for moisture or corrosion.
Probe Won’t Advance: The pipe may be severely clogged with compacted soil. Gently rotate the probe while applying forward pressure, or switch to a slimmer inspection tool such as the FOXWELL Y400 Borescope, which features a 0.24 in ultra‑slim probe capable of navigating tighter bends.
Water Still Pools After Cleaning: Re‑examine the pipe for hidden cracks or collapsed sections that may be diverting flow. In such cases, professional replacement is often the safest solution.
Conclusion
Detecting a clogged French drain without digging is achievable through systematic observation, pressure testing, and targeted visual inspection. By following the seven steps outlined above, one can identify the location and cause of a blockage, decide whether a simple clean‑out will suffice, or determine if professional excavation is necessary. The recommended inspection cameras—MugEasy Endoscope Camera, Teslong Borescope, and FOXWELL Y400 Borescope—provide reliable, cost‑effective solutions for homeowners who prefer a DIY approach. Armed with these tools and techniques, one can protect a home’s foundation, avoid costly repairs, and maintain optimal drainage performance.
Products Mentioned in This Guide
Frequently Asked Questions
What are the easiest visual signs that a French drain is clogged?
Puddles or standing water near the drain outlet, slow drainage after rain, and damp, soggy soil are common visual clues.
How can I use a garden hose to test for a blockage?
Run water through the hose at the drain inlet; if water backs up or drains very slowly, a clog is likely present.
Do I need an inspection camera to locate a French drain blockage?
An inspection camera isn’t required but it helps pinpoint the exact location of the obstruction without digging.
Can a simple water level test reveal a clogged French drain?
Yes, compare water depth in a nearby low spot to the drain’s exit; a higher level indicates reduced flow caused by a blockage.
When should I call a professional instead of DIY testing?
If water continues to pool after all non‑invasive tests, or if the drain is inaccessible or damaged, hire a professional to avoid costly mistakes.