Introduction
One will learn how to calibrate indoor hygrometers and wireless humidity sensors for each season. Accurate humidity data prevents mold growth, protects electronics, and improves comfort. This guide explains why calibration matters, which tools simplify the process, and how to maintain reliable readings year after year. The reader will be able to perform the procedure without specialized laboratory equipment.
The article assumes an intermediate level of familiarity with basic temperature and humidity concepts. Technical terms such as relative humidity, dew point, and psychrometer are defined where necessary. The steps are organized so that a homeowner, hobbyist, or small‑business operator can follow them independently. By the end of the guide one will have a documented calibration routine ready for future use.
What You’ll Need
- TempPro TP50 – Digital hygrometer with ±2‑3% RH accuracy, $12.99, 4.6/5 rating (155,479 reviews).
- Protmex PT6508 – Advanced psychrometer offering dew‑point and wet‑bulb readings, $54.99, 4.6/5 rating (1,093 reviews).
- Govee H5075 – Bluetooth hygrometer with app alerts, $12.99, 4.5/5 rating (48,372 reviews).
- Govee H5075 3‑Pack – Multiple units for distributed monitoring, $34.99, 4.5/5 rating (48,372 reviews).
- Ayawiss Hygrometer – Compact sensor with auto‑calibration, $5.67, 4.4/5 rating (1,896 reviews).
Step 1: Prepare the Environment and Baseline Instruments
One should select a room that experiences minimal airflow and stable temperature for the calibration session. The chosen space must be allowed to reach equilibrium for at least thirty minutes after any heating, cooling, or ventilation changes. Place the TempPro TP50 on a flat surface away from direct sunlight; its wellness indicator quickly shows whether the environment is dry, comfortable, or wet. Record the initial temperature and humidity readings, noting the device’s high/low memory values for later comparison.
The Protmex PT6508 serves as a secondary reference because it provides wet‑bulb and dew‑point data that can confirm the TP50’s accuracy. Power the PT6508, select the dual display mode, and allow its sensors to stabilize for five minutes. Its range of 0‑100% RH and –20 °C to 60 °C makes it suitable for most indoor environments. Write down the PT6508 values alongside the TP50 readings; any discrepancy greater than ±2% RH suggests the need for adjustment.
Step 2: Perform Seasonal Calibration Using a Reference Hygrometer
One should compare the readings from the TP50 and PT6508 with a known‑good reference hygrometer; the Govee H5075 is an excellent choice because its Bluetooth app stores twenty‑day historical data for verification. Position the Govee H5075 at the same height as the other sensors and enable app alerts for temperature or humidity deviations. The Govee’s ±3% RH accuracy and 2‑second refresh rate provide a reliable benchmark during seasonal transitions.
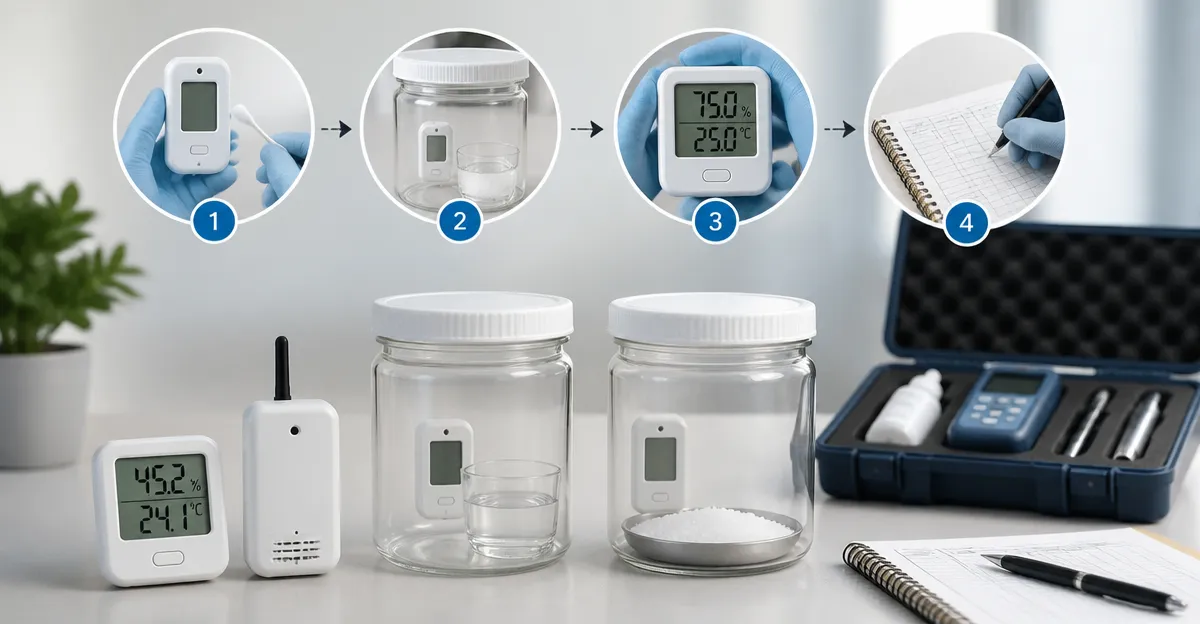
If the three devices differ by more than the manufacturer’s stated tolerance, adjust the TP50 using its built‑in calibration button. Press and hold the C/F button for two seconds to reset the high/low memory, then use the calibration mode to add or subtract the observed offset. For example, if the TP50 reads 55% RH while the Govee records 58% RH, increase the TP50 reading by three percent points. Document the adjustment in a calibration log for future reference.
Step 3: Adjust Sensor Settings and Record High/Low Values
After the initial correction, one should enable the high/low recording feature on each device to monitor seasonal extremes. The TP50 automatically tracks the highest and lowest temperature and humidity since the last reset, which is useful for identifying peak conditions in summer and winter. The PT6508 offers similar maximum and minimum functions, plus data retention that can be exported via its USB interface if deeper analysis is required.
The Govee H5075 allows the user to set custom alert thresholds; configure the app to notify when humidity exceeds 65% RH in summer or drops below 30% RH in winter. This proactive approach prevents damage to wooden furniture, musical instruments, or electronic equipment. Record the high/low values in a spreadsheet, noting the date, time, and ambient conditions for each season.
Step 4: Validate Calibration with Wireless Monitoring
One should now deploy the calibrated sensors in their intended locations to verify consistent performance. Use the Govee H5075 3‑Pack to monitor multiple rooms, such as a basement, garage, and nursery, simultaneously. The 196 ft Bluetooth range ensures reliable data transmission to a smartphone, while the app’s 20‑day cloud storage preserves historical trends for analysis.
Place an Ayawiss Hygrometer in a small space like a terrarium to test the calibration in a confined environment; its auto‑calibration routine runs for three minutes after power‑on, providing a quick sanity check. Compare the Ayawiss reading with the nearest Govee unit; any divergence greater than ±5% RH may indicate a localized airflow issue rather than sensor error. Adjust ventilation or relocate the sensor as needed, then re‑record the values.
Step 5: Document Results and Schedule Future Checks
One must compile all recorded data into a single document that includes the date of calibration, the offset applied to each device, and the observed seasonal trends. Highlight any recurring discrepancies, such as a consistent low bias in the basement during winter, and note corrective actions taken. Store the document in both a cloud folder and a local drive to ensure accessibility for future audits.
Finally, establish a quarterly reminder to repeat the calibration process, especially after major weather changes or HVAC system maintenance. Regular verification maintains sensor integrity and protects valuable assets from humidity‑related damage. By following this systematic approach, one can achieve reliable humidity monitoring throughout the year.
Tips & Pro Tips
- Allow all sensors to acclimate for at least thirty minutes before taking measurements; sudden temperature shifts can produce misleading readings.
- Use a magnetic back on the TP50 to attach it to a refrigerator door, providing a stable reference point in the kitchen.
- When using the Govee app, enable data export to CSV every month; this facilitates trend analysis with spreadsheet software.
- For professional environments, the Protmex PT6508’s dew‑point function helps assess condensation risk on metal surfaces.
- Keep spare AAA batteries on hand; low battery voltage can cause sensor drift, especially in the Ayawiss model.
Troubleshooting
- Sensor reads constantly high or low values. Verify that the device is not placed near a heat source, direct sunlight, or a draft. Reset the high/low memory and recalibrate using the reference hygrometer.
- Bluetooth connection drops. Ensure the Govee units are within the specified 196 ft range and that there are no thick walls or metal objects obstructing the signal. Relocate the smartphone closer to the sensor during initial pairing.
- Calibration offset does not persist after power loss. Some devices require a battery removal to retain settings; replace the battery promptly after adjustment to avoid loss of calibration data.
Conclusion
This guide has demonstrated how to seasonally calibrate hygrometers and wireless humidity sensors using reliable, affordable tools. By following the five numbered steps, documenting adjustments, and employing the tips provided, one can maintain accurate humidity data across all indoor spaces. Consistent calibration protects health, preserves valuables, and enhances overall comfort throughout the year. Readers are encouraged to implement the routine and share their results with peers.
Products Mentioned in This Guide
Frequently Asked Questions
Why should I calibrate my hygrometer each season?
Seasonal calibration corrects sensor drift caused by temperature changes, ensuring accurate humidity readings that prevent mold, protect electronics, and maintain comfort.
What basic tools do I need to seasonally calibrate a hygrometer?
A reference hygrometer or calibrated psychrometer, a stable environment (e.g., sealed container), and a simple spreadsheet or notebook for logging readings.
Can I calibrate a wireless humidity sensor without a lab?
Yes, using a trusted reference device and a sealed salt‑solution or saturated‑air method you can achieve ±2‑3% RH accuracy at home.
How often should I repeat the calibration process?
Perform the calibration at the start of each season (four times a year) or whenever you notice a consistent reading offset.
What is the easiest method to verify calibration accuracy?
Place both the sensor and a calibrated reference hygrometer in a sealed container with a known humidity source (e.g., saturated salt solution) and compare their readings after 30 minutes.