Introduction
In this guide, one will learn how to complete a thorough basement moisture audit in ninety minutes. The process combines visual inspection, precise measurement, and immediate remediation steps. By following the checklist, a homeowner can identify hidden damp spots, stop active leaks, and implement preventive measures that reduce the risk of mold growth. The guide is designed for an intermediate audience who possesses basic DIY skills and wants to protect the structural integrity of the home.
What You’ll Need
- Flashlight or headlamp
- Protective gloves and goggles
- Measuring tape
- Notebook or digital device for documentation
- Dehumidifier (optional for post‑audit drying)
- Klein Tools ET140 Moisture Meter – pinless detection
- General Tools MMD4E Moisture Meter – pin type
- General Tools MMD7NP Moisture Meter – pinless with LED alerts
- RDINSCOS Pinless Moisture Meter – budget option
- General Tools MMH800 Moisture Meter – dual‑mode with temperature
Step 1 – Visual Assessment of the Basement
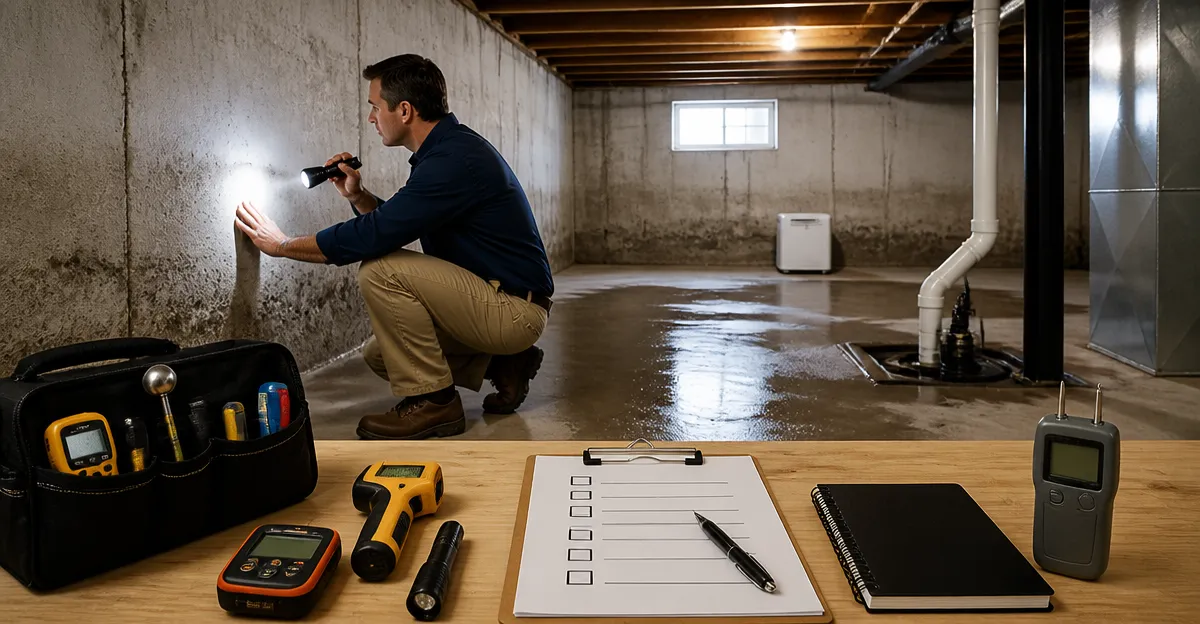
The first step is to perform a systematic visual walk‑through. One should turn on a bright flashlight and examine walls, floors, and ceiling for discoloration, efflorescence, or peeling paint. Pay special attention to corners where water may pool and to areas near exterior walls, foundation cracks, and utility penetrations. Document each suspect location with a brief note and, if possible, a photograph. This visual baseline guides the placement of moisture‑measuring tools in later steps.
Step 2 – Measure Ambient Conditions
Before using any meter, record the temperature and relative humidity of the basement. A digital hygrometer can provide these readings within seconds. Ideal conditions for accurate moisture measurement are a temperature between fifteen and twenty‑two degrees Celsius and a relative humidity below sixty percent. If the humidity is higher, consider running a dehumidifier for fifteen minutes before proceeding, as elevated air moisture can skew surface readings.
Step 3 – Locate Hidden Moisture with a Pinless Meter
Pinless meters detect moisture up to three‑quarters of an inch below the surface using electromagnetic field (EMF) technology. For this step, one should scan each wall and floor section identified in Step 1. Hold the meter flat against the surface, press the mode button to select the appropriate material, and observe the LED bar graph and reverse‑contrast display.
- Recommended Tool: Klein Tools ET140 Moisture Meter
- Features: Pinless detection to 0.75 in, material‑specific modes for drywall, masonry, hardwood, and softwood, bright reverse‑contrast display, and nine LED bars indicating moisture range.
- Price: $49.97
- Rating: 4.5 / 5.0 (6,176 reviews)
The ET140 is useful because it provides non‑destructive readings, allowing the auditor to map moisture gradients without creating additional holes. Its material‑specific calibration improves accuracy compared with generic pinless devices.
For a more budget‑friendly option, the RDINSCOS Pinless Moisture Meter offers similar depth detection for $20.15 and a 4.5‑star rating, making it suitable for homeowners who need a quick scan.
Step 4 – Verify Material Moisture with a Pin‑Type Meter
After identifying suspect zones with the pinless meter, one should confirm the moisture content of specific materials such as wood studs or concrete blocks. Pin‑type meters measure electrical resistance between two stainless‑steel pins, converting the value to a percentage of moisture. Insert the pins perpendicular to the surface, wait for the reading to stabilize, and record the value.
- Recommended Tool: General Tools MMD4E Moisture Meter
- Features: Dual‑mode for wood and building materials, 0.1 % resolution, hold function, audible completion beep, and includes a 9 V battery.
- Price: $37.70
- Rating: 4.5 / 5.0 (15,167 reviews)
The MMD4E is advantageous because its pin system provides precise readings for wood moisture between 5 % and 50 %, and for concrete, drywall, and masonry between 1.5 % and 33 %. The hold button allows the auditor to record readings without keeping the meter inserted, which speeds up the audit.
If a non‑invasive approach is preferred, the General Tools MMD7NP Moisture Meter combines pinless scanning with LED colour alerts and an audible alarm. Priced at $49.99 with a 4.3‑star rating, it offers a balance between depth detection (0.75 in) and visual feedback.
Step 5 – Document Findings and Prioritize Repairs
Using the notebook or digital device, create a table that lists each location, the pinless reading, the pin reading (if applicable), and any visual observations. Assign a risk level based on moisture percentage: low (below 10 %), moderate (10‑20 %), and high (above 20 %). Prioritize high‑risk areas for immediate repair, such as sealing foundation cracks, repairing gutter downspouts, or installing a vapor barrier.
Step 6 – Implement Immediate Leak‑Stopping Measures
For each high‑risk area, take corrective action within the next thirty minutes of the audit. Common measures include:
- Applying waterproof sealant to foundation cracks
- Redirecting downspout discharge away from the foundation
- Installing interior sump pump if water accumulation is observed
- Using a dehumidifier to lower ambient humidity while repairs dry
When precise moisture monitoring of a repaired surface is required, the General Tools MMH800 Moisture Meter provides both pin and pinless modes, temperature, and humidity readings. Although priced at $111.86, its dual‑function capability ensures that one can verify both surface and internal moisture after sealant application.
Step 7 – Set Up Ongoing Monitoring
After the initial audit and repairs, install a permanent humidity sensor in the basement to alert the homeowner when relative humidity exceeds sixty percent. Pair the sensor with a smart plug that powers a dehumidifier automatically. Continue to use a pinless meter quarterly to re‑scan high‑risk zones, especially after heavy rain or seasonal changes.
Tips & Pro Tips
- Always calibrate the meter according to the manufacturer’s instructions before the first use.
- Avoid measuring over metal studs, wiring, or pipe surfaces, as they can cause signal interference for pinless meters.
- When using pin‑type meters, insert the pins at a 90‑degree angle to achieve consistent contact.
- Record the ambient temperature for each reading; temperature fluctuations can affect moisture percentages.
- For large open‑area scans, move the pinless meter slowly to capture a continuous moisture map.
Troubleshooting
| Problem | Possible Cause | Solution |
|---|---|---|
| Meter displays 0 % moisture consistently | Dead battery or sensor malfunction | Replace the 9 V battery; if the problem persists, contact the manufacturer’s warranty service. |
| Readings fluctuate wildly between spots | Surface not flat or presence of metal interference | Ensure the meter is held flat; move away from metal studs or pipes. |
| LED bar graph does not change | Incorrect material mode selected | Select the correct material mode (drywall, wood, masonry) before scanning. |
Conclusion
By following this ninety‑minute basement moisture audit, one can reliably detect hidden damp, stop active leaks, and establish a preventive maintenance routine. The combination of visual inspection, pinless scanning, and pin‑type verification provides a comprehensive picture of moisture distribution. Implementing the recommended repairs and ongoing monitoring will safeguard the home against mold, structural decay, and costly remediation.
Products Mentioned in This Guide
Frequently Asked Questions
How long does a complete basement moisture audit take?
The audit is designed to be finished in about 90 minutes, covering inspection, measurement, and initial remediation.
What tools are essential for detecting moisture in a basement?
A flashlight, protective gear, measuring tape, and a moisture meter (pinless or pin type) are the core tools.
Can I use a dehumidifier during the audit?
A dehumidifier is optional during the audit but useful afterward to dry any identified wet areas.
How do I document moisture findings efficiently?
Record readings and observations in a notebook or digital device, noting location, moisture level, and any visible damage.
What immediate steps should I take if I find active leaks?
Seal the leak source, improve drainage, and dry the area promptly to prevent mold growth.