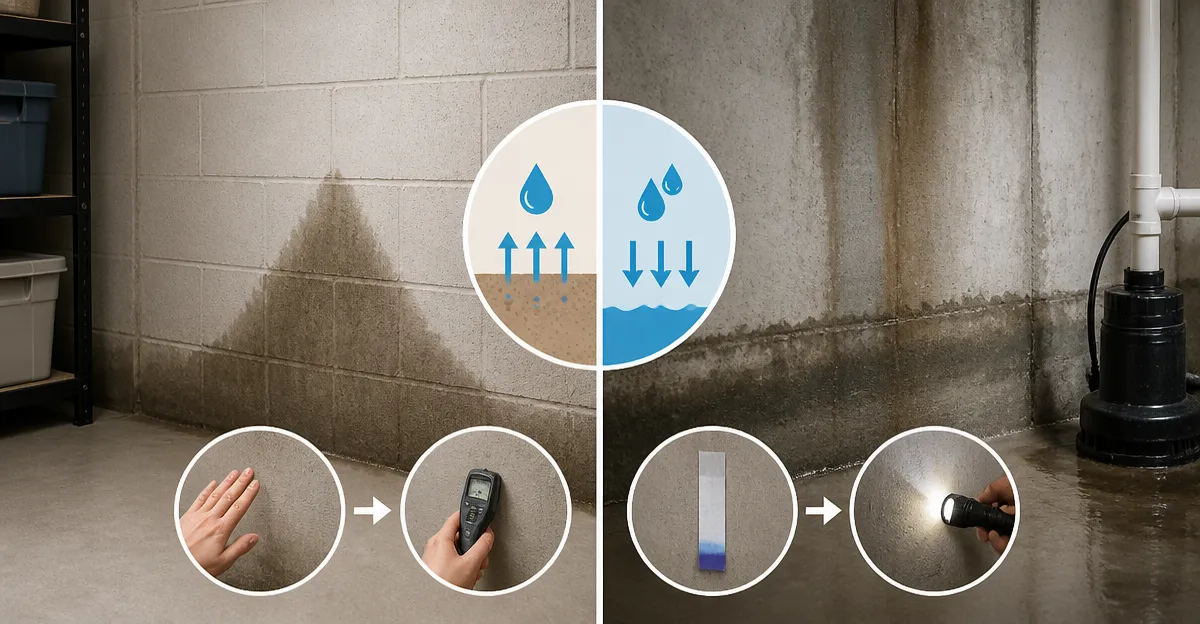
How to Detect Moisture Wicking vs Groundwater Seepage in Basement Walls: Key Signs, Simple Tests & Fixes
Introduction
One will learn how to differentiate between moisture wicking through capillary action and groundwater seeping through structural cracks. Understanding the distinction enables the selection of the most effective remediation method and prevents costly over‑treatment. This guide presents visual cues, inexpensive field tests, and step‑by‑step corrective actions. The information is valuable for homeowners, property managers, and DIY enthusiasts who wish to protect finished spaces and preserve structural integrity.
What You’ll Need
- Protective gloves and goggles
- Moisture meter or hygrometer
- Plastic sheeting and painter’s tape
- Concrete brush or roller
- Sealant or waterproofing coating (recommended products are listed below)
- Cleaning rags and mild detergent
Step 1: Perform a Visual Inspection
The first step is to walk the perimeter of the basement and note any discoloration, efflorescence, or staining on walls and floors. Efflorescence appears as white, powdery deposits that indicate water movement through masonry; it is a common sign of wicking. Stains that are darker near the floor and fade upward often suggest groundwater pressure pushing water upward. Document the locations with photographs to track changes over time.
When cracks are observed, measure their width with a ruler. Cracks wider than 1/8 inch are likely pathways for groundwater, while hairline fissures typically support capillary rise. At this stage, one may consider applying a flexible sealant to prevent further infiltration.
For extensive cracks or areas where water pressure is evident, the Liquid Rubber Foundation Sealant provides a high‑build, elastomeric membrane that adheres to concrete, masonry, and wood. It offers 900% elongation, ensuring that the coating remains intact as the substrate moves. The product costs $179.95, carries a 4.6‑star rating from 3,377 reviews, and covers up to 50 sq ft per gallon on interior surfaces.
Step 2: Conduct the Moisture Wicking Test
To determine whether capillary action is the primary source, one can use the plastic‑sheet method. Cut a piece of 6‑mil polyethylene sheeting to the size of a standard floor tile and secure its edges to the wall with painter’s tape, creating a sealed pocket against the masonry.
- Leave the sealed area undisturbed for 24 hours.
- After the period, remove the tape and examine the interior surface of the plastic for moisture droplets.
- If droplets are present, moisture has migrated through the wall material, indicating wicking.
- If the plastic remains dry while the wall shows staining, groundwater pressure is likely the cause.
For walls that exhibit wicking, a breathable yet water‑resistant coating such as Ames Block & Wall Waterproofer is suitable. This white liquid rubber adheres to a variety of substrates and creates a flexible membrane. Priced at $49.91 with a 4.6‑star rating from 339 reviews, it is ideal for interior applications where a visible white finish is acceptable.
Step 3: Perform the Groundwater Seepage Test
Groundwater seepage is best identified by a pressure test that simulates hydrostatic conditions. Fill a large plastic bucket with water and place it against the suspected wall area, ensuring a tight seal with a rubber mallet and the bucket’s rim.
- Leave the bucket in place for 30 minutes.
- Observe the wall surface for new wet spots or increased staining.
- If the wall becomes wet, water is being forced through the substrate, confirming seepage.
- Record the time and extent of wetting for future reference.
When seepage is confirmed, a robust, low‑VOC coating such as KILZ Basement Waterproofing Paint can be applied as a finishing layer. This paint utilizes nanotechnology to resist up to 12 psi of water pressure, dries to the touch in one hour, and fully cures in 7–14 days. It is priced at $42.98, holds a 4.7‑star rating from 1,244 reviews, and adds a decorative white finish that also blocks moisture.
Step 4: Evaluate Structural Conditions
Even after successful sealing, the structural condition of the foundation must be assessed. Look for bowing walls, uneven floors, or settlement cracks that exceed 1/4 inch. These symptoms often require professional engineering evaluation rather than DIY coating.
If the foundation is sound but minor hairline cracks persist, the INSL‑X WaterBlock Masonry Waterproofer offers an acrylic, alkali‑resistant solution for vertical applications. It covers interior and exterior masonry, tolerates pH‑13 environments, and withstands 12 psi hydrostatic pressure. The product sells for $49.99, has a 4.6‑star rating from 296 reviews, and can be applied with a brush or roller.
For emergency flood events while repairs are underway, the Quick Dam Flood Barrier provides a rapid, water‑activated barrier that expands to 3.5 inches within ten minutes. Priced at $22.19 and rated 4.4 stars by 6,335 reviewers, it is an affordable stop‑gap that can protect doorways, garage entries, and low‑lying openings.
Step 5: Apply the Chosen Waterproofing Solution
Before any coating is applied, the surface must be clean, dry, and free of loose material. Use a mild detergent and a stiff brush to remove efflorescence, then rinse thoroughly and allow the wall to dry for at least 24 hours.
Apply the selected product according to the manufacturer’s instructions. For Liquid Rubber Foundation Sealant, use a brush, roller, or sprayer to achieve a uniform layer, allowing each coat to cure for 24 hours; typically two to three coats are required for interior walls. For Ames Block & Wall, apply three coats with a brush, allowing the surface to dry between coats. For paints such as KILZ Basement Waterproofing Paint or INSL‑X WaterBlock, a single coat may be sufficient, but a second coat improves durability.
After the final coat has cured, re‑measure moisture levels with a meter. Values below 15 % relative humidity indicate that the wall is effectively sealed. Maintain a record of the test results for future reference and schedule periodic inspections to catch any new infiltration early.
Tips & Pro Tips
- Always test a small, inconspicuous area before full application to verify adhesion and color compatibility.
- When working in cold weather, ensure ambient temperature is between 50 °F and 90 °F; low temperatures can impede curing.
- Combine sealants with a reinforcing fabric such as Liquid Rubber Geo‑Textile on joints and transitions for maximum durability.
- Use a high‑quality moisture meter with a stainless‑steel probe to avoid corrosion and obtain accurate readings.
- For exterior walls, consider applying a UV‑stable topcoat over Ames Block & Wall to protect the white membrane from sun degradation.
Troubleshooting
Problem: Persistent damp spots after sealing.
Solution: Verify that the substrate was fully dry before application; re‑apply an additional coat of the chosen sealant and ensure proper ventilation during curing.
Problem: Sealant peeling or bubbling.
Solution: This often results from applying over a surface with high oil or grease content. Clean the area with a trisodium phosphate (TSP) solution, rinse, and allow to dry completely before re‑application.
Conclusion
One now possesses a systematic approach to distinguishing moisture wicking from groundwater seepage, conducting reliable field tests, and selecting the appropriate waterproofing product. By following the visual inspection, testing, and application steps, a homeowner can protect a basement from future water damage while avoiding unnecessary expense. Regular monitoring and maintenance will extend the life of the waterproofing system and preserve the value of the property.
Products Mentioned in This Guide
Frequently Asked Questions
What is the main difference between moisture wicking and groundwater seepage in basement walls?
Moisture wicking moves through concrete by capillary action, while groundwater seepage enters through cracks or gaps in the foundation.
Which visual signs indicate moisture wicking rather than seepage?
White efflorescence, uniform staining, and dampness on the interior surface without obvious cracks suggest wicking.
How can I perform a simple field test to tell if water is wicking or seeping?
Tape a sheet of plastic to the wall; if condensation appears on the inside after 24‑48 hours, the moisture is wicking, whereas wet spots on the sheet indicate seepage.
What basic tools do I need to diagnose basement wall moisture issues?
A moisture meter or hygrometer, protective gloves, goggles, plastic sheeting, painter’s tape, and a concrete brush are sufficient for most inspections.
What is a quick fix for moisture wicking after it’s identified?
Apply a penetrating sealant or waterproofing coating to the interior wall surface after cleaning and drying the area.