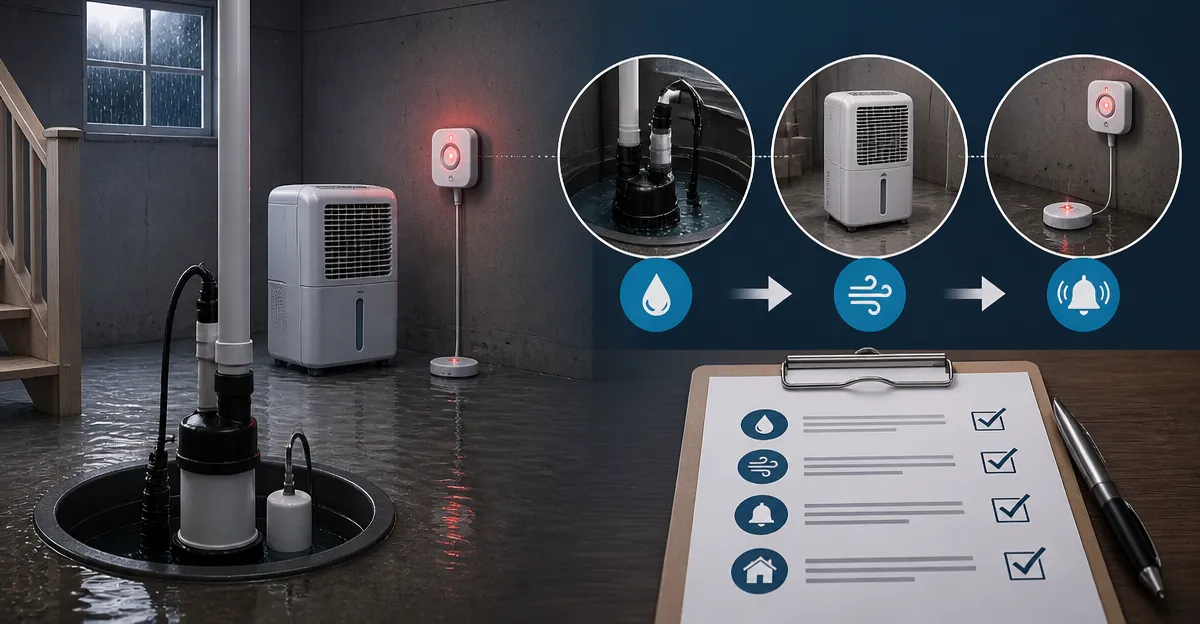
How to Design an Effective Flood Response Plan Using a Sump Pump, Dehumidifier, and Water Alarms
Introduction
Flooding can cause extensive damage to a residence, particularly in basements and ground‑level rooms. A well‑designed flood response plan reduces water intrusion, limits structural harm, and protects valuable possessions. This guide explains how to assess risk, install critical equipment, and establish routine maintenance procedures. Readers will learn how to select appropriate pumps, integrate moisture control devices, and configure alarms that provide early warning. By following the steps, one can achieve a resilient system that operates automatically and requires minimal manual intervention.
What You Will Need
- Submersible sump pump (recommended models listed below)
- Heavy‑duty drainage hose and power cord extensions
- Battery‑backed water alarm or float switch
- Industrial‑grade dehumidifier suitable for basement use
- Basic hand tools, pipe sealant, and mounting hardware
- Protective gloves and safety glasses
Step 1: Assess Flood Risk and Determine Pump Capacity
The first step is to evaluate the potential volume of water that could enter the space during a storm. Measure the square footage of the area and estimate the depth of water that might accumulate. Multiply area by depth to obtain the required drainage volume in gallons. Choose a pump whose maximum flow rate exceeds this volume by at least 25 percent to ensure rapid removal.
For modest residential basements, a pump delivering between 2,000 and 4,500 gallons per hour is typically sufficient. For larger or high‑risk locations, a higher‑capacity unit such as the Zoeller M63 Sump Pump provides up to 4,320 GPH and includes a built‑in float switch for automatic operation.
The Zoeller model features an oil‑filled motor, cast‑iron housing, and a non‑clogging vortex impeller, all of which contribute to durability and low maintenance. It is rated 4.5 stars by 452 reviewers and is priced at $291.44, representing a solid investment for long‑term flood protection.
Step 2: Install the Sump Pump in the Lowest Point
Locate the lowest point of the basement floor; this is where water naturally pools. Dig a pit that accommodates the pump’s dimensions, typically 12‑inch diameter and 24‑inch deep. Place a layer of sand at the bottom to provide a stable base and improve suction.
Position the AgiiMan Pool Cover Pump if the application involves a pool cover or shallow water removal. This pump delivers 850 GPH, operates at 110 V, and includes a 16‑foot anti‑twist drainage hose plus a 25‑foot power cord, allowing safe placement away from electrical outlets. It is rated 4.4 stars by 6,112 reviewers and costs $34.19, making it an economical choice for secondary drainage tasks.
Secure the pump with the provided mounting brackets, ensuring the inlet remains fully submerged. Connect the discharge hose to a floor drain or exterior runoff area, using the supplied adapters to match hose size. Verify that the hose slope directs water away from the foundation to prevent re‑entry.
Step 3: Configure Automatic Activation with a Float Switch or Water Alarm
An automatic activation device eliminates the need for manual monitoring. The Zoeller M63 includes a built‑in snap‑action float switch that triggers the pump when water reaches a preset level. For additional redundancy, install a battery‑backed water alarm such as a standard 12‑V float sensor wired to a household alarm circuit.
Mount the float sensor at a height that corresponds to the maximum acceptable water level, typically 2‑3 inches below the floor joists. Connect the sensor to the pump’s power source using a waterproof junction box. Test the system by pouring water into the pit; the pump should start automatically and the alarm should sound.
Regular testing, at least once per month, ensures reliable operation during an emergency. Replace batteries in the alarm annually to maintain readiness.
Step 4: Select and Position a Dehumidifier for Moisture Control
Even after water removal, residual humidity can cause mold growth and structural decay. Choose a dehumidifier with a capacity of at least 50 pints per day for a typical 1,200‑square‑foot basement. Place the unit centrally, away from walls, to promote even air circulation.
While no specific dehumidifier is listed among the recommended products, the same principles apply: select a unit with an automatic shut‑off, built‑in humidistat, and continuous drainage option. Connect the dehumidifier to a condensate pump or direct it to a floor drain to avoid overflow.
Run the dehumidifier continuously during the rainy season, and schedule a weekly cleaning of the air filter to preserve efficiency.
Step 5: Connect the Drainage System to an Exterior Discharge Point
The discharge hose must terminate at a location where water can flow away from the foundation. Ideal sites include a dry well, French drain, or municipal storm sewer (subject to local regulations). Use a hose clamp to secure the hose to a PVC fitting, and seal the joint with pipe sealant to prevent leaks.
If the exterior point is more than 25 feet from the pump, consider the Tenzzola Submersible Utility Pump. This 1/3 HP pump moves up to 2,400 GPH and includes a 16.4‑foot cord, allowing flexible placement. It features a side inlet that reduces debris intake and a multi‑use hose adapter for various fittings. Priced at $54.99 with a 4.3‑star rating, it offers a versatile backup for high‑volume scenarios.
Secure the hose with a ground‑level anchor to prevent movement during heavy flow. Verify that the discharge point does not cause erosion or pooling near the house.
Step 6: Establish Routine Maintenance and Inspection Schedule
Maintenance is essential to retain system reliability. Perform the following tasks monthly: inspect the pump inlet for debris, test the float switch, clean the discharge hose, and verify alarm battery health. Quarterly, run the pump for a short cycle to lubricate moving parts.
Annually, conduct a full system test by simulating a flood condition. Drain the pump’s reservoir, clean the impeller, and re‑apply sealant to all connections. Replace any worn hoses or adapters; the Green Expert Submersible Pump offers a lightweight alternative for occasional cleaning tasks, delivering 1,800 GPH at a modest price of $54.99 and a 4.5‑star rating.
Document each maintenance activity in a logbook. This record assists in warranty claims and provides evidence of diligent care should insurance adjusters request proof of upkeep.
Tips & Pro Tips
- Install a check valve on the discharge line to prevent backflow when power is lost.
- Use a surge protector for the pump’s power cord to guard against voltage spikes during storms.
- Consider a secondary battery‑backed pump such as the WAYNE CDU1000 Sump Pump for critical situations; it moves up to 6,100 GPH, features a vertical float switch, and is built with cast iron and stainless steel for maximum durability.
- When routing hoses through walls, employ a sealed bulkhead fitting to maintain the building envelope.
- Keep the pump’s power cord away from standing water; the 25‑foot cord on the AgiiMan pump provides ample clearance.
Troubleshooting
| Problem | Possible Cause | Solution |
|---|---|---|
| Pump does not start | Float switch not activated or power loss | Check water level, ensure float moves freely, verify outlet power and reset circuit breaker. |
| Reduced flow rate | Clogged inlet or hose kink | Turn off power, remove hose, clear debris, straighten hose, and restart. |
| Noise or vibration | Unstable placement or air lock | Secure pump on a level surface, prime the pump by filling the pit, and add a small amount of water to the inlet. |
Conclusion
Designing an effective flood response plan requires careful assessment, proper equipment selection, and disciplined maintenance. By installing a reliable submersible pump, integrating an automatic water alarm, and employing a high‑capacity dehumidifier, one can protect a home from costly water damage. The steps outlined in this guide empower homeowners to create a resilient system that operates automatically and can be trusted during severe weather events.
Products Mentioned in This Guide
Frequently Asked Questions
How do I determine the correct sump pump capacity for my basement?
Calculate the volume of water your basement could collect during a worst‑case event and choose a pump that can move that volume at least twice as fast, typically measured in gallons per minute (GPM).
What are the benefits of using a battery‑backed water alarm?
A battery‑backed alarm continues to operate during power outages, giving early warning of rising water so you can intervene before damage occurs.
How often should I maintain my sump pump and dehumidifier?
Inspect and test the sump pump monthly, clean the intake and discharge lines quarterly, and service the dehumidifier according to the manufacturer’s schedule, usually every 6‑12 months.
Can a dehumidifier prevent mold after a flood event?
Yes, by keeping relative humidity below 60 % it slows mold growth, but it should be used alongside thorough drying and ventilation.
What safety precautions are needed when installing a sump pump?
Turn off electricity, wear protective gloves and glasses, ensure proper grounding, and verify that all electrical connections are waterproof and up to code.