How to Dehumidify a Basement with Radiant Floor Heating: Step‑by‑Step Guide to Reduce Humidity, Prevent Mold, and Protect Your Floors
Introduction
Basement humidity is a common source of mold, structural damage, and uncomfortable living conditions. One of the most effective ways to control moisture is to combine proper ventilation with radiant floor heating, which gently raises floor temperature and encourages evaporation without creating drafts. This guide explains how to assess moisture levels, install a radiant floor heating manifold, and fine‑tune the system for optimal dehumidification. By following the steps, readers will protect their flooring, improve indoor air quality, and extend the lifespan of their basement space.
What You’ll Need
- AB Radiant Floor Manifold (8‑loop stainless‑steel manifold, $205.79, 4.4/5 rating, 195 reviews)
- PEX tubing (½‑inch compatible, length based on layout)
- Adjustable wrench and pliers
- Insulation boards or rolls for floor and walls
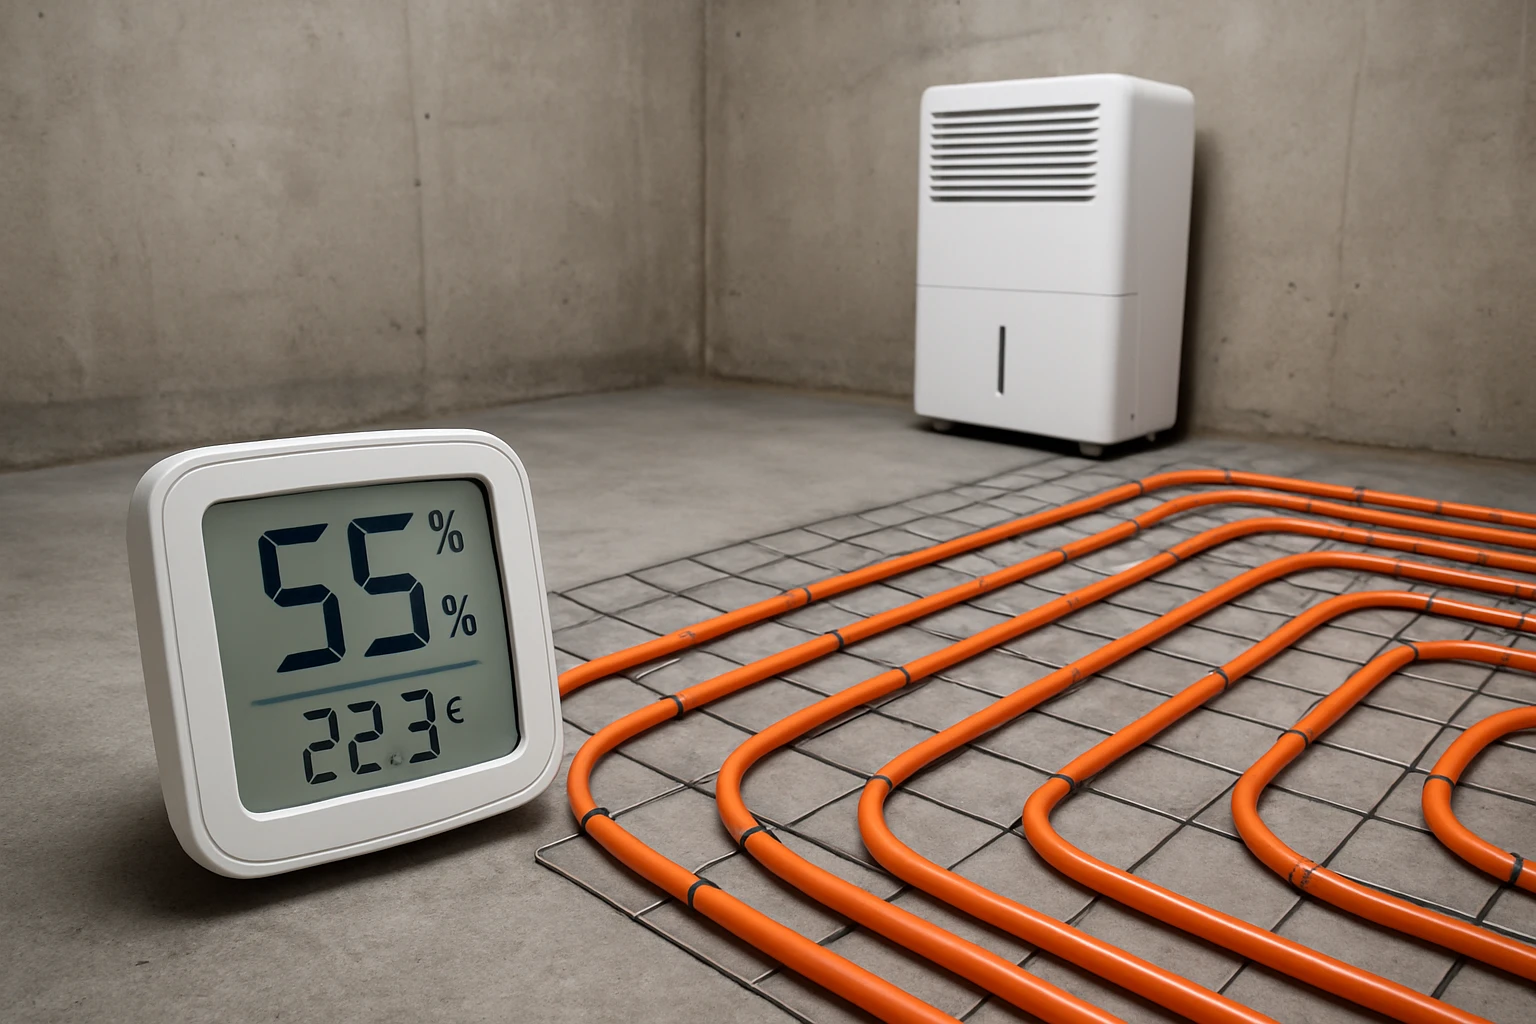
- Digital hygrometer (to monitor relative humidity)
- Dehumidifier rated for basement size (optional backup)
- Electrical conduit and thermostat compatible with hydronic system
Step 1: Assess Basement Moisture Levels
Begin by measuring the relative humidity (RH) at multiple points in the basement using a digital hygrometer. Ideal RH for a finished basement ranges from 30 % to 50 %; values above 60 % indicate a high risk of mold growth. Record the temperature and RH during both daytime and nighttime to capture fluctuations caused by external weather. If the readings consistently exceed the target range, proceed to the next step to install a heating solution that will aid dehumidification.
Step 2: Prepare the Floor Surface
Clear the floor of debris, old carpeting, and any moisture‑absorbing materials. Apply a vapor barrier—typically a 6‑mil polyethylene sheet—over the concrete to stop ground moisture from rising into the heated layer. Secure the barrier with construction tape and ensure seams are overlapped by at least 6 inches. Finally, lay insulation boards or rigid foam to reduce heat loss and improve the efficiency of the radiant system.
Step 3: Install the AB Radiant Floor Manifold
Locate a central wall that is easily accessible for plumbing connections and thermostat wiring. Mount the heavy‑duty stainless‑steel bracket that comes with the AB Radiant Floor Manifold using the provided screws, ensuring the bracket is level. The manifold includes an automatic air vent, shut‑off valve, drain valve, temperature gauge, flow valve, and balancing wheels, which simplify installation and future adjustments. Connect the ½‑inch PEX adapters (included) to the manifold’s outlets with regular pliers; no specialized PEX tools are required, which saves time and expense.
Step 4: Route PEX Tubing to the Floor Loops
Measure and cut PEX tubing to create eight equal loops that will distribute heated water evenly across the floor surface. Attach each loop to the corresponding outlet on the manifold, using the built‑in balancing wheels to fine‑tune flow rates for uniform heat output. Secure the tubing to the insulation boards with zip ties or staples, keeping the layout tidy and avoiding sharp bends that could restrict flow. Verify that each loop is securely clamped to prevent leaks during system pressurization.
Step 5: Connect the Manifold to the Boiler or Water Heater
Install a 1‑inch female pipe thread (FPT) supply and return line from your existing boiler to the manifold’s main ports. Use appropriate pipe sealant and tighten connections with an adjustable wrench to avoid water loss. The manifold’s built‑in flow meter, rated up to 1.4 GPM, allows you to monitor water circulation and adjust pump speed accordingly. Once connected, slowly fill the system with water, purging air through the automatic vent until a steady stream emerges.
Step 6: Install a Thermostatic Control System
Select a thermostat designed for hydronic heating, and mount it on the wall near the manifold for easy access. Wire the thermostat to the boiler’s control circuit, following the manufacturer’s schematic to ensure safe operation. Program the thermostat to maintain floor temperatures between 68 °F and 74 °F, which is sufficient to raise surface temperature enough to encourage moisture evaporation without overheating the space. Enable any built‑in humidity‑sensing features if available, allowing the system to respond automatically to high RH readings.
Step 7: Commission the System and Test Dehumidification
Turn on the boiler and allow water to circulate through the manifold for at least 30 minutes while monitoring the temperature gauge. Use the digital hygrometer to record RH before and after the heating cycle; a drop of 5‑10 % typically indicates effective dehumidification. Adjust the balancing wheels on each loop if certain areas remain cooler, as uneven heat can lead to localized moisture pockets. If the RH remains above 50 %, consider adding a supplemental dehumidifier sized for the basement’s cubic footage.
Tips & Pro Tips
- Seal all wall penetrations with caulk to prevent humid air from bypassing the heated floor.
- Install a perimeter drainage system or sump pump if the basement experiences chronic water intrusion; heating alone cannot compensate for standing water.
- Use a programmable timer on the thermostat to run the system during the night when outdoor humidity is lower, maximizing moisture removal.
- Periodically check the manifold’s pressure gauge and drain valve to ensure no sediment buildup is restricting flow.
Troubleshooting
Problem: RH does not decrease after heating.
Solution: Verify that the boiler is delivering adequate flow; increase pump speed or check for clogged filters. Ensure that all PEX connections are leak‑free, as air pockets can reduce efficiency.
Problem: Uneven floor temperature.
Solution: Re‑balance the manifold’s individual loops using the manual wheels, and inspect insulation for gaps that may cause heat loss.
Conclusion
By integrating a reliable radiant floor heating manifold with proper moisture‑control practices, one can effectively dehumidify a basement, prevent mold, and safeguard flooring investments. The step‑by‑step process outlined above empowers homeowners to implement a long‑lasting solution that combines comfort with health benefits. Regular monitoring and minor adjustments will keep the system performing optimally for years to come.
Products Mentioned in This Guide
Frequently Asked Questions
How does radiant floor heating assist in dehumidifying a basement?
The heated floor raises surface temperature, encouraging moisture to evaporate and be vented without creating drafts, which lowers overall humidity.
What relative humidity level is ideal for a basement?
Aim for 30‑50% RH to prevent mold growth while maintaining comfortable conditions.
Is a separate dehumidifier necessary when using radiant floor heating?
Often not, but a dehumidifier can be useful in extremely damp climates or during heavy rain periods.
How should I monitor and adjust humidity with this system?
Place a digital hygrometer in the basement and adjust the heating thermostat or add ventilation until the desired RH range is maintained.
What common mistakes should I avoid when installing a radiant floor heating manifold for dehumidification?
Avoid undersizing the manifold, neglecting insulation, and forgetting to seal gaps that let cold air in, as these reduce heating efficiency and dehumidification performance.